Authorization in Blazor
In this video we will discuss Authorization in Blazor, specifically how to show and hide UI elements depending on the authentication state of the user.
Authorization in ASP.NET Core

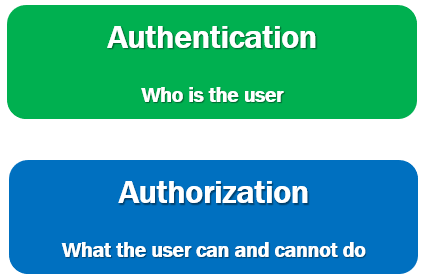
- Authentication is the process of identifying who the user is.
- Authorization is the process of identifying what the user can and cannot do.
- For example, if the logged in user, is an administrator, he may be able to Create, Read, Update and Delete orders, where as a normal user may only view orders but not Create, Update or Delete orders.

Access is typically granted or denied based on whether:
- A user is authenticated (logged in).
- A user is in a role.
- A user has a claim.
- A policy is satisfied.
We discussed all these concepts i.e authorization using roles, claims and policies in detail in ASP.NET Core tutorial for beginners course. We use roles, claims and policies the same way in ASP.NET Core MVC apps, razor pages and Blazor. If you are new to these concepts please check out videos starting at Part 77 from ASP.NET Core tutorial for beginners course.
Blazor AuthorizeView component
- In Blazor we use
AuthorizeViewcomponent to show or hide UI elements depending on whether the user is authorized to see it. - In this example,
AuthorizeViewcomponent is used in it's simplest form, without any parameters (i.e roles or policies), so, it only checks if the user is authenticated. - If the user is authenticated, then the content in
<Authorized>component is displayed, otherwise, the content in<NotAuthorized>component is displayed.
<AuthorizeView>
    <Authorized>
        This content is displayed only if the user is Authorized
    </Authorized>
    <NotAuthorized>
        This content is displayed if the user is Not Authorized
    </NotAuthorized>
</AuthorizeView>
CascadingAuthenticationState component
If you get the following error
InvalidOperationException: Authorization requires a cascading parameter of type Task<AuthenticationState>. Consider using CascadingAuthenticationState to supply this.
The error message is pretty good. It clearly tells us what needs to be done. Authentication state must be provided to the application and we do this by wrapping by the <Router> component with <CascadingAuthenticationState> component. The <Router> component is in App.razor file.
<CascadingAuthenticationState>
    <Router AppAssembly="@typeof(Program).Assembly">
        <Found Context="routeData">
            <RouteView RouteData="@routeData" DefaultLayout="@typeof(MainLayout)" />
        </Found>
        <NotFound>
            <LayoutView Layout="@typeof(MainLayout)">
                <p>Sorry, there's nothing at this address.</p>
            </LayoutView>
        </NotFound>
    </Router>
</CascadingAuthenticationState>
Role or policy based authorization in Blazor
Both role-based and policy-based authorization is supported in Blazor. For role-based authorization, use the Roles parameter.
<AuthorizeView Roles="administrator, manager">
    <p>Displayed if the logged in user is in administrator or manager role</p>
</AuthorizeView>
For policy-based authorization, use the Policy parameter:.
<AuthorizeView Policy="admin-policy">
    <p>Displayed if the logged in user staisfies admin-policy</p>
</AuthorizeView>
AuthorizeView component context variable
AuthorizeViewcomponent exposes acontextvariable.- The variable type is
AuthenticationState. - Use it to access autneticated user information.
In the following example, we are using the context variable to displayed the logged-in username.
<AuthorizeView>
    <Authorized>
        <li class="nav-item px-3">
            <NavLink class="nav-link" href="/identity/account/logout" Match="NavLinkMatch.All">
                <span class="oi oi-power-standby" aria-hidden="true"></span>
                Logout (@context.User.Identity.)
            </NavLink>
        </li>
    </Authorized>
</AuthorizeView>
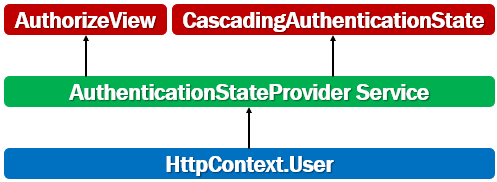
AuthenticationStateProvider service

- Blazor has a built-in service called
AuthenticationStateProviderservice. - This service obtains authentication state data from ASP.NET Core's
HttpContext.User. - This is how authentication state integrates with existing ASP.NET Core authentication mechanisms.
- It is this service that is used by
AuthorizeViewcomponent andCascadingAuthenticationStatecomponent to get the authentication state. - Don't use
AuthenticationStateProviderdirectly. Use theAuthorizeViewcomponent. - The main drawback to using
AuthenticationStateProviderdirectly is that the component isn't notified automatically if the underlying authentication state data changes.
© 2020 Pragimtech. All Rights Reserved.

