Blazor cookie authentication - Login page
ASP.NET Core Identity provides cookie authentication out of the box. In this video we will discuss how to integrate this cookie authentication in a Blazor application.
Scaffold ASP.NET Core Identity
The first step is to scaffold ASP.NET Core Identity into our existing Blazor application. ASP.NET Core Identity provides user registration, login, logout, two factor authentication etc out of the box. We discussed scaffolding ASP.NET Core Identity in Part 51 of Blazor tutorial.
Configure cookie authentication services
In ConfigureServices() method of the Startup class
- AddAuthentication() - Adds cookie authentication services. ASP.NET Core Idenity writes a cookie with scheme "Identity.Application" which is specified as the default scheme.
- AddCookie() - As the name implies, adds the cookie services.
public void ConfigureServices(IServiceCollection services)
{
    services.AddAuthentication("Identity.Application")
        .AddCookie();

    // Rest of the code
}
In Configure() method of the Startup class, UseAuthentication() and UseAuthorization() methods add authentication and authorization middleware components to the request processing pipeline.
public void Configure(IApplicationBuilder app, IWebHostEnvironment env)
{
    // Rest of the code

    app.UseRouting();
    app.UseAuthentication();
    app.UseAuthorization();
    app.UseEndpoints(endpoints =>
    {
        endpoints.MapBlazorHub();
        endpoints.MapFallbackToPage("/_Host");
    });
}
Login navigation menu
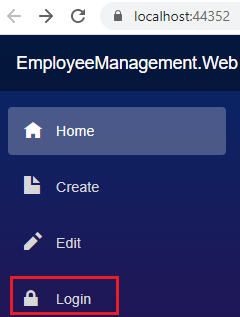
Navigation menu is in Shared\NavMenu.razor file. Include the following NavLink element.
ASP.NET core identity login page is in Areas\Identity\Pages\Account\Login.cshtml. Areas and Pages folders are not required in the URL, so the URL path to get to the login page is /identity/account/login.
<li class="nav-item px-3">
    <NavLink class="nav-link" href="/identity/account/login" Match="NavLinkMatch.All">
        <span class="oi oi-lock-locked" aria-hidden="true"></span> Login
    </NavLink>
</li>
ASP.NET Core Identity Services
Areas\Identity\IdentityHostingStartup.cs is added by the identity scaffolder. The class in this file adds
- Identity Services.
- Entity Framework Services.
- Specifies the DbContext and the database connection string to use.
public class IdentityHostingStartup : IHostingStartup
{
    public void Configure(IWebHostBuilder builder)
    {
        builder.ConfigureServices((context, services) => {
            services.AddDbContext<EmployeeManagementWebContext>(options =>
                options.UseSqlServer(
                    context.Configuration.GetConnectionString("EmployeeManagementWebContextConnection")));

            services.AddDefaultIdentity<IdentityUser>(options => options.SignIn.RequireConfirmedAccount = true)
                .AddEntityFrameworkStores<EmployeeManagementWebContext>();
        });
    }
}
Registering a new user
At this point, navigate to the root application URL and click on the Longin link.

On the login page. Click on Register as a new user link. Provide Email, Password and Confirm Password.
On the subsequent page click on the link - Click here to confirm your account.
You can now use the registered username and password to login. The registered user details are stored in the Identity database table AspNetUsers.
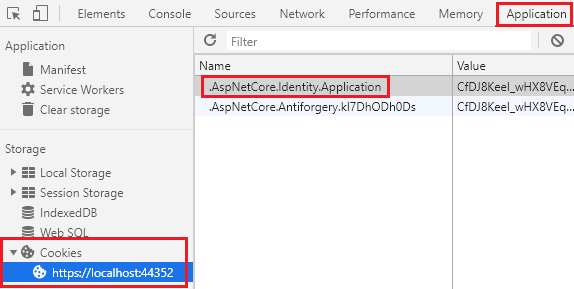
Launch browser developer tools by pressing F12, and login. Under the Application tab, you will find authentication cookie with the scheme Identity.Application. This is same as the default scheme we specified in ConfigureServices() method of the Startup class.

In our next video we will implement Logout functionality.
© 2020 Pragimtech. All Rights Reserved.

